If someone had told me that building a bass bin would have been as complicated as it has been turning out to be I might have had second thoughts but there again I probably would have just proceeded anyway with careless abandon. Just getting to the initial stage of construction was a long drawn out affair as I had to calculate the volume required for the bass bin but the only measurement I had was the width of the entire bass bin and amp enclosure to work with. Working on a guesstimate of half the width as a starting reference and 1 cubic foot for the volume I threw a series of numbers at a spreadsheet that worked out the volume for me until the required figure and the projected figure were close enough. I then found out that 10" sub woofer I have recommends a cubic volume of 0.75 cubic feet - arse!! Cue more calculations and tweaking of figures until I managed to get it to a compromise of about 0.825 cubic feet. As a result I will probably end up experimenting a bit with the level of fill that I put into the enclosure due to the over-sizing but that is a problem that can be managed at a later time - all that mattered was that I had measurements for the box
For construction of your sub-woofer\amp enclosure take vast amounts of 15mm ply, similarly vast amounts of 32 x 32mm box, a sack of 30mm screws, various other sized screws, ducting, glue, silicone sealant, an old mat from the back of the van and a few other odds and sods as required. Add in circular saws, drills, screwdrivers, clamps, tape measures and a life saving mitre saw courtesy of UKB\Paul B and you can start.
For construction of your sub-woofer\amp enclosure take vast amounts of 15mm ply, similarly vast amounts of 32 x 32mm box, a sack of 30mm screws, various other sized screws, ducting, glue, silicone sealant, an old mat from the back of the van and a few other odds and sods as required. Add in circular saws, drills, screwdrivers, clamps, tape measures and a life saving mitre saw courtesy of UKB\Paul B and you can start.
 The initial stages of construction.
 Taking shape.
 The main box frame fully constructed.
 Amps in place for measuring where the mounting boards needs to be fitted. The one on the left is to power all the speakers other than the sub-woofer - that is getting powered by the one on the right running a low pass filter at 80Hz. BOOM!!
 Given the amount of glue that has been whacked between each of the joints on this construction there was very little chance of it leaking but just to make sure all of the seams have been sealed with silicone. I wouldn't recommend using the clear variety of silicone sealant as it is a right pain when you have to apply it by hand at the points where you can't get the cartridge gun - being clear you can't see the stuff and end up either missing parts or reapplying to the same point! It also looks shite in a photo...
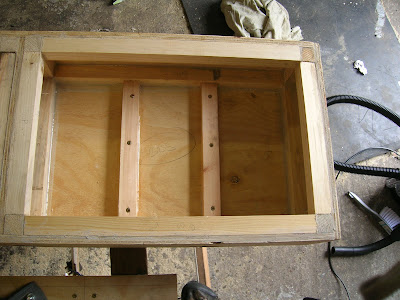
 Tracking laid in for the power cables and speaker wires and the amp mountings in with some shock absorption added in for good measure.
 View from the other side.
 Finally got the lids cut out last night and temporarily screwed into place just to make sure everything is in place.
Next stage will be to get the hole cut out for the sub and the riser plate (visible on the right) fitted and once that has been done then I can run the speaker wires through to the sub and get those sealed off, add a bit of stuffing and that will be that for that side.
For the amp side it is a matter of running in power, earth and remote power for each amp, cutting out the holes for the fans and wiring those up, figuring out which screws I am going to use for fixing where they will be visible and last but not least the small matter of how to fix the whole thing to the floor. After that I think that is probably that until next month when I can afford the carpet to cover the whole enclosure.
1 comment:
Good effort sir.
Post a Comment